I have several Raspberry Pi boards (it seems every time I buy one they release another one) but no real finished project. I was thinking that I have this Raspberry Pi B model one sitting idle and if I didn’t do something with it soon they will release the Pi sub zero and it will never go in a project because the new Pi will be cheaper and more capable than good old version one.
I originally planned to use this Pi as a kitchen computer. But issues with the back light not turning off completely when the screen was off (asleep) made me put that project on hold.
So the first step was to decide what to do with it. After printing from an SD card to my 3D printer I started to think about the possibility of untethering my printers from my desktop computer. I was looking around and saw the Octo-pi has come along quite a lot and they now have a touch interface plugin.
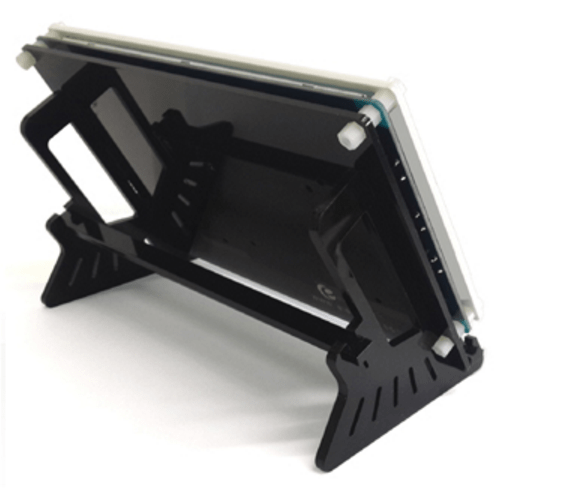
I previously designed a holder for the kitchen computer that the display sat on a lip but I wanted to 3D print something and that would be complex.
I also want to attach the Raspberry Pi.
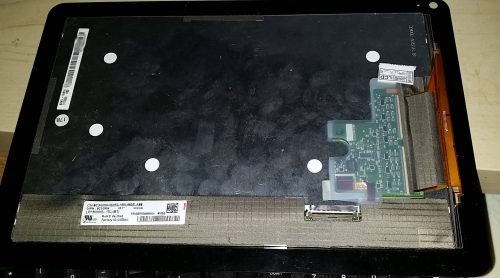
The official Raspberry Pi display has special bosses to attach it to various items. But looking at the back of my display there is nothing to attach so I cannot do this sort of thing. Originally I wanted to mimic this.
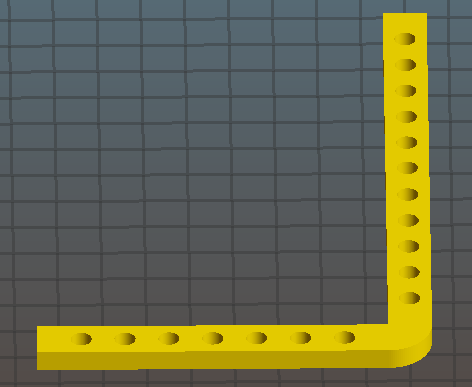
To make the frame I wanted to attach various things so I made some basic building blocks in my CAD software. I knew I had to join these pieces together. So I added holes 10mm apart that are to sized to fit metal inserts that I will heat set into the plastic. The size of the inserts are 5mm and take a 3mm screw.
As this was the first time I have used the inserts, I made a small piece 60mm long with varying sized holes to make sure my inserts would go into the holes when heated. I also created a joining piece and printed one to make sure they were thick enough that the screw was flush with the bottom of the insert.
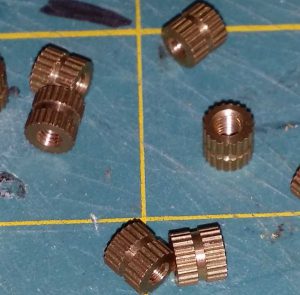
I got an old soldering iron heated it up and practised. The process takes a few seconds and feels like a hot knife in butter too much pressure and the insert will come right through to the other side and out.
The inserts I got have straight lines on the outside, this is because they were cheap the more expensive ones had the lines diagonal and probably have more grip,
This is what my L piece looks like.
I wanted something more that would overlap the 2 L pieces and also give it support to stop it twisting so I added a small vertical wall that will hold the alignment.

